Showing posts with label Frame. Show all posts

Friday, 11 March 2011

And so the end is near...

We've come to face the final curtain,
What's more I'll say it clear, I'll state my case of which I'm certain.
I've had the bestest time, week after week with the Compendium challenges,
So here to end the ride, I did it
MYYYYYY WAAAAAAAY!
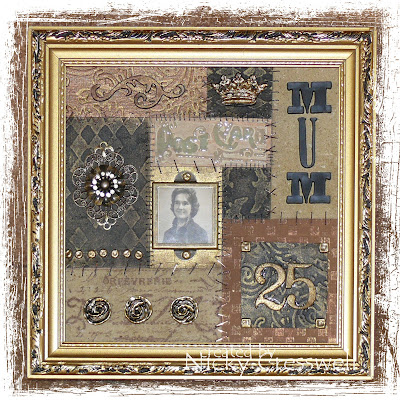
Ok i actually did it Tim's way as directed on page 67, but of course with my own twist.
I tried i don't know how many times to get a good photo but this was the best of the lot, i will try and get a better one later, It looks so much better in person!
OK second attempt at a decent photo.. Well i tried is all i can say!
***
I can't quite believe we have covered every technique in the book but boy what a fun time it has been,
I would say i'm sad it's had to come to an end but i have that sneeky feeling the lovely Linda has an ace up her sleeve so instead i shall say I thank you Linda for the past 35 weeks and i hope there are many more to come xxx
Stay Inky
♥ HUGZ ♥
Photobucket

Tuesday, 1 March 2011

March on Springtime!

Hello my lovelies,
The month of march is upon up and with it brings the start of a new challenge and later in the month my birthday!
So as a little thank you to my followers i'm having a little

The only rules i have for this is..
You must be a follower and post at least 2 comments on my work this month.
That way the people who really do follow me may be rewarded.
So no advertising on your blogs is needed this is just a thank you to MY followers x
{not sure what the prize will be yet but i'm sure whoever wins will be happy}
*****
Right now for the new challenge
Over on The Artistic Stamper team blog the theme this month is
'SPRING
And what signifies spring better then new life... captured in this altered frame.
I started off by covering an old wooden frame with brown paper.
I then got the a piece of the plastic packaging from one of tims idea-ology packs, i think i used the time pieces one.
I got a piece of green paper and stamped the distressed background all over it in pine needles distress ink.
I then placed it over the plastic and carefully cut out holes where the plastic circle dips of the packaging were.
I attached the paper to the plastic
Then it was time to fill the holes
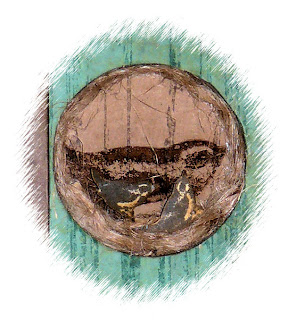
 I stamped the large bird directly onto the plastic from the back using stazon, i then stamped 2 of the little birds onto white card, cut them out and placed them in the circle with some old string to look like nest material.
 More little stamped birds for this window but with some punched out branches, i used the MS branch punch.
 Same as above only this time i stamped the little bird onto sticky back canvas
 More punched branches, and the little bird house gathering made from shrink plastic
Another big bird in sticky back canvas coloured with distress inks, and more string bedding, which i placed by his feet so it looks like he's been out collecting for the nest!

Finally i stamped the saying onto a scrap of paper {i like the shape of it!} and added a teeny tiny real feather i found and had been saving for a special project.
All the bird stamps used were from either the Birds of a Feather or Free as a Bird sets.
The last thing i did was to mount the finished plastic onto another piece of paper, this time kraft coloured {which i had also stamped with the distressed background to see a contrasting colour through each window} and placed into the frame.
I hope you've enjoyed my project today, sorry it's been a bit of a long post. Hope you didn't nod off lol
I look forward to seeing all your 'spring' creations!
♥ HUGZ ♥
Photobucket

Thursday, 27 November 2008

I was "Framed" i tell you

This time round the curtains have opened up on the altercation of a FRAME
It just so happens i had a sad lonely cheap wood frame that i had coated silver and then left neglected for some time, i re-coloured the frame with a brown acrylic dabber.
That was the easy bit... I then must of spent a total of 2 or so hours stamping and cutting out what seemed like a never ending pile of multiple size Stitchel flowers, leaves & bugs from Basic Grey figgy pudding papers, once these were all finally done i further inked them to give an aged less shiny and new look. Then it was a case of just sticking em all onto the frame, i used silicone for this.
Ah voila.. one frame...

...but being me, i decided to go a tad further and decorate the back of the glass as well, i used a new twirl frame stamp available here to create a smaller frame inside using brown stazon, i let it dry. I have some fab copper leaf, which i stuck all round the stamped frame using my {once thought useless never used} Stick and Stamp pad {finally i have a use for it lol} and where it missed a couple of spots i dabbed some copper coloured acrylic dabber, giving the overall look from the front as sort of mottled. I finished with a cute image printed from my TH Distressables CD, highlighted a couple of areas using similar colours to those in the paper flowers to tie it all together.

It actually came out better than i thought it would so I'm quite chuffed with it.

What do you think?

xx Hugz xx